Resurrecting the VAXen, part 3: Hardware Repairs
This post is part of an on-going, multi-decade series on my half-hearted attempts to get all my VAX hardware up and running.
- Resurrecting the VAXen, part 1
- Resurrecting the VAXen, part 2: SCSI2SD
- Resurrecting the VAXen, part 3: Hardware Repairs
Start and stop is the nature of a lot of personal projects. I started to get my VAXen up and running several years ago and then, had to stop for other life reasons.
My condo was remodeled and I’m having to reassemble my lab, so it seems like a good time to restart the project.
First thing first was testing all the VAXen on taking them out of storage. All booted and got to the boot monitor, except for my VAXstation 4000/90. For the entire time I’ve owned it, this poor VAX has never booted and I never dedicated the time to diagnosing it. This is my most powerful VAX, so I’ve always wanted to restore it to a working state.
Turns out, there were two major issues with this VAX:
- A Damaged SIMM socket, presumably preventing memory
- A dead clock battery
VAXen have diagnostic lights to assist in boot up diagnostics. This VAX had all eight lights lit steady on bootup, and would not progress from there.
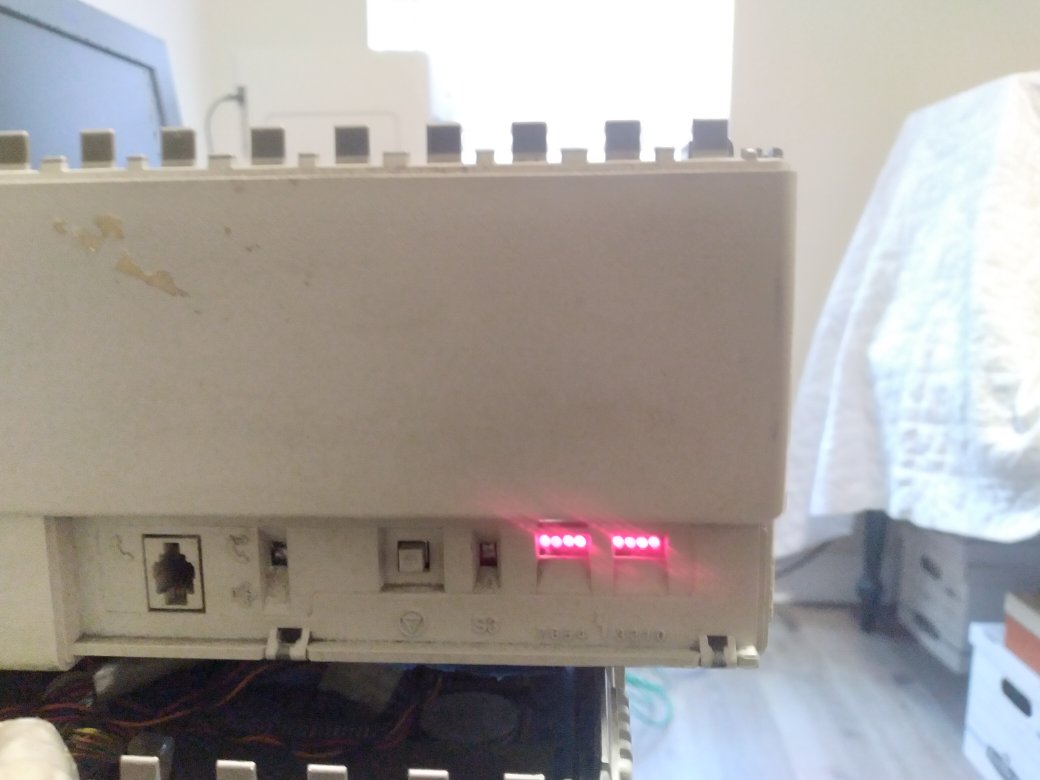
According to the VAXArchive, this means “Power is applied, but no instruction is executed”; essentially, no instructions have been executed by the CPU. During normal startup, this is the first light combination displayed, but a healthy VAX quickly progresses to other light sequences.
Staying in this state, per my research, generally indicates a memory issue or an issue with the real time clock.
First, I experimented with the memory. Maybe I had a bad module? Luckily, my VAXstation 4000/60 is functional and takes the same SIMMs as the 4000/90.
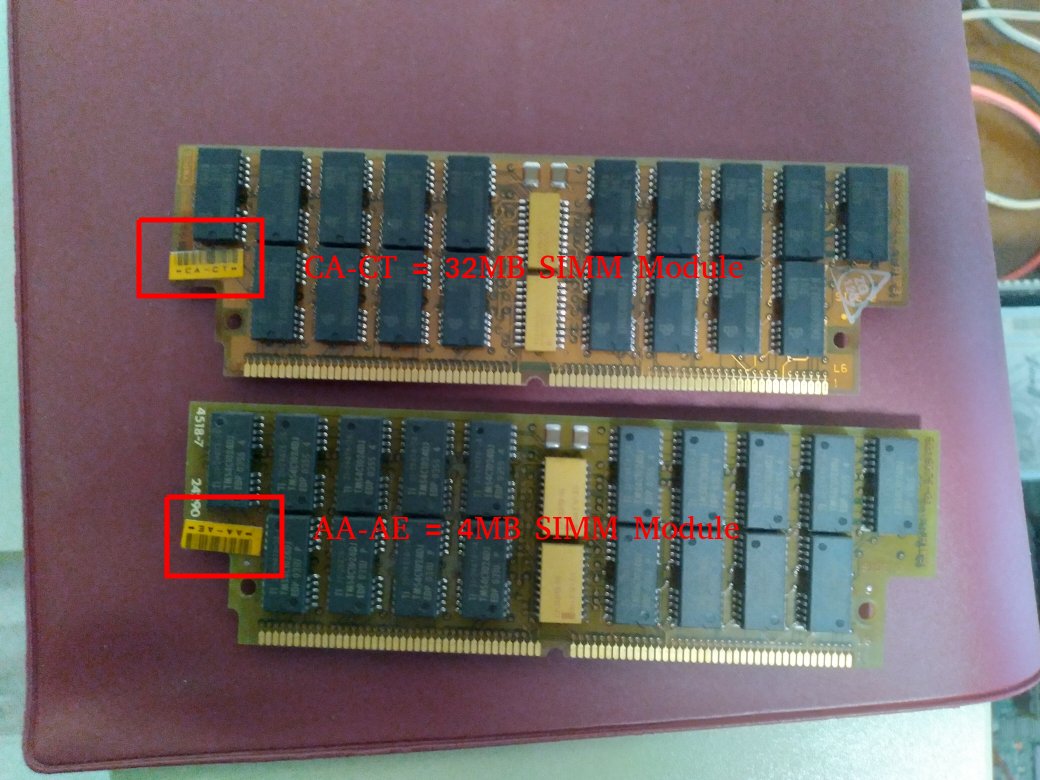
To my knowledge there are 2 sizes of SIMM modules available for VAXstation 4000s: 4MB and 16MB. These are fairly easy to distinguish based on the labels affixed to them. AA mean 4MB, CA means 16MB
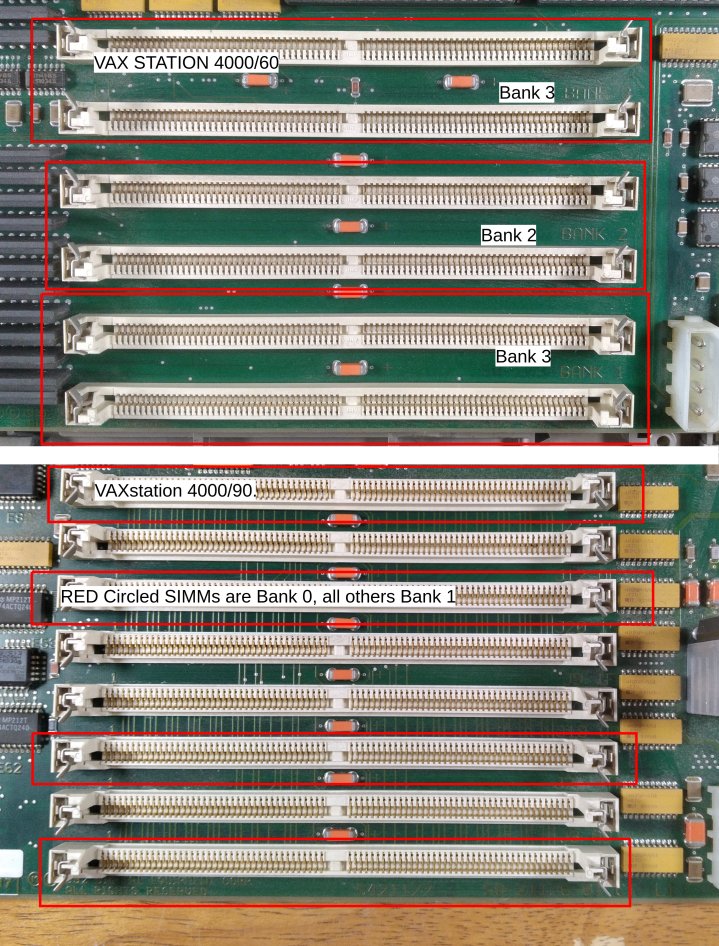
For the 4000/90, these need to be installed in sets of four. The 4000/90 has 8 slots and no on-board RAM, where as the 4000/60 has 6 slots and 8MB of onboard RAM.
The 4000/60 and the 4000/90 are different in how SIMMs must be installed and the differences are not immediately intuitive. Fortunately, the service manual is available in the MANX Archive.
For the 4000/60, matching pairs must be installed with the lower capacity SIMMs in lower numbered banks.
For the 4000/90, matching sets of 4 must be installed in a staggered pattern.
All of the RAM from the 4000/90 tested good in the 4000/60, so all of the SIMM modules were good.
My 4000/90 is “fully loaded”, and it has always had all SIMM spots occupied. So, knowing that the SIMMs were good, I loaded only one set of four.
On power up, I got the boot monitor!
This is the first time this machine has booted in the decade I’ve owned it!
The culprit here was a damaged SIMM socket, it’s very difficult to get a picture of this, but I’ve tried.
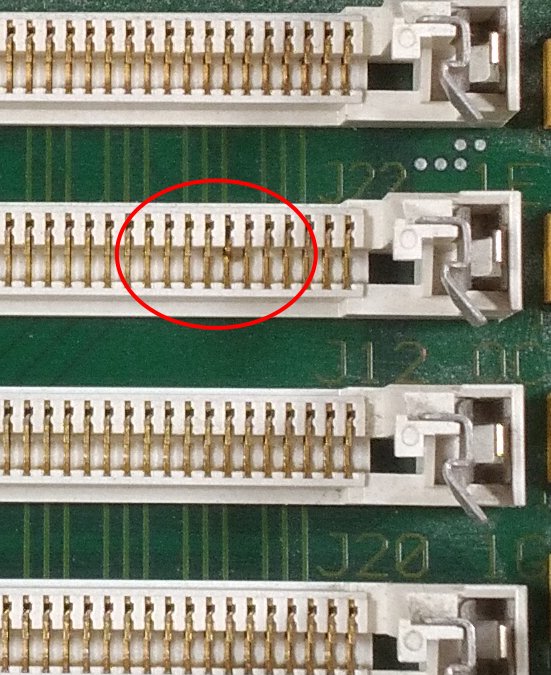
I’ve ordered, what may be a replacement on Digi-Key.
Now, this solved some of the problems, but it was not always reliably booting. If I started it completely cold, it would still be stuck with all diagnostic LEDs illuminated. However, a quick power cycle after a few minutes of running would reliably get the machine to the boot monitor.
This has to be the real time clock, as I’ve seen reports that a dead real time clock will cause this symptom. The battery is, I presume, the original and does not hold a charge. Interestingly enough, the 4000/60 does not seem to be affected by this, even though it’s a similar, but not identical, system board.
Most DEC products of this era use the DS1287 RTC chip. This chip contains both the circuitry for the clock, as well as a built in battery. These have been out of production for years, and many people have resorted to hacking them to replace the built in battery.
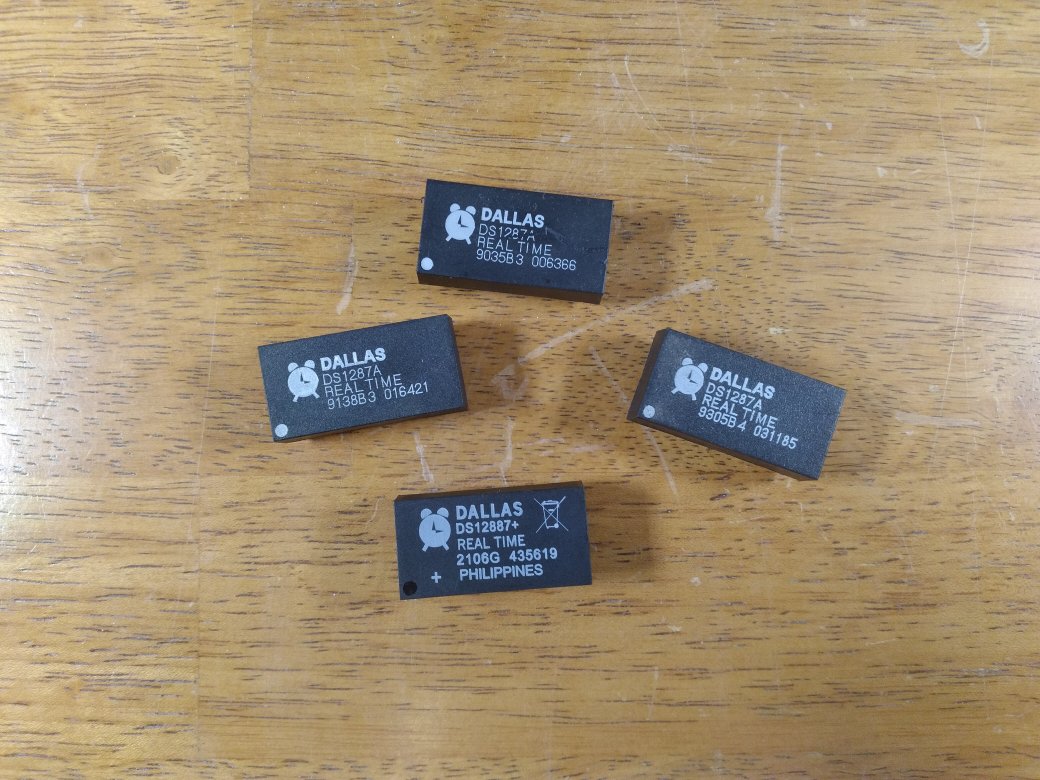
I can’t be arsed to do something like that, especially because there are plug-compatible parts stil being produced. The DS12887+ and DS12887A+ are produced by Maxim Integrated Products, and I’ve used them before in PCs and other systems that use the DS1287. I figured I might as well replace ALL of my DS1287’s so I’ve ordered several from Digi-Key At over $10 a pop, they are not as economical as coin cells, but it beats having to do some time consuming modification to the either the DS1287 chip or the board.
The last remaining issue is that the SCSI2SD card that I’m using with
the VAXes always throws an error on boot. I can later issue boot
dka0 from the system monitor, but this error prevents the VAX from
auto-booting.
?? 001 10 SCSI 0048
Currently, I can’t seem to find any information for this error, but that’s something for another day.